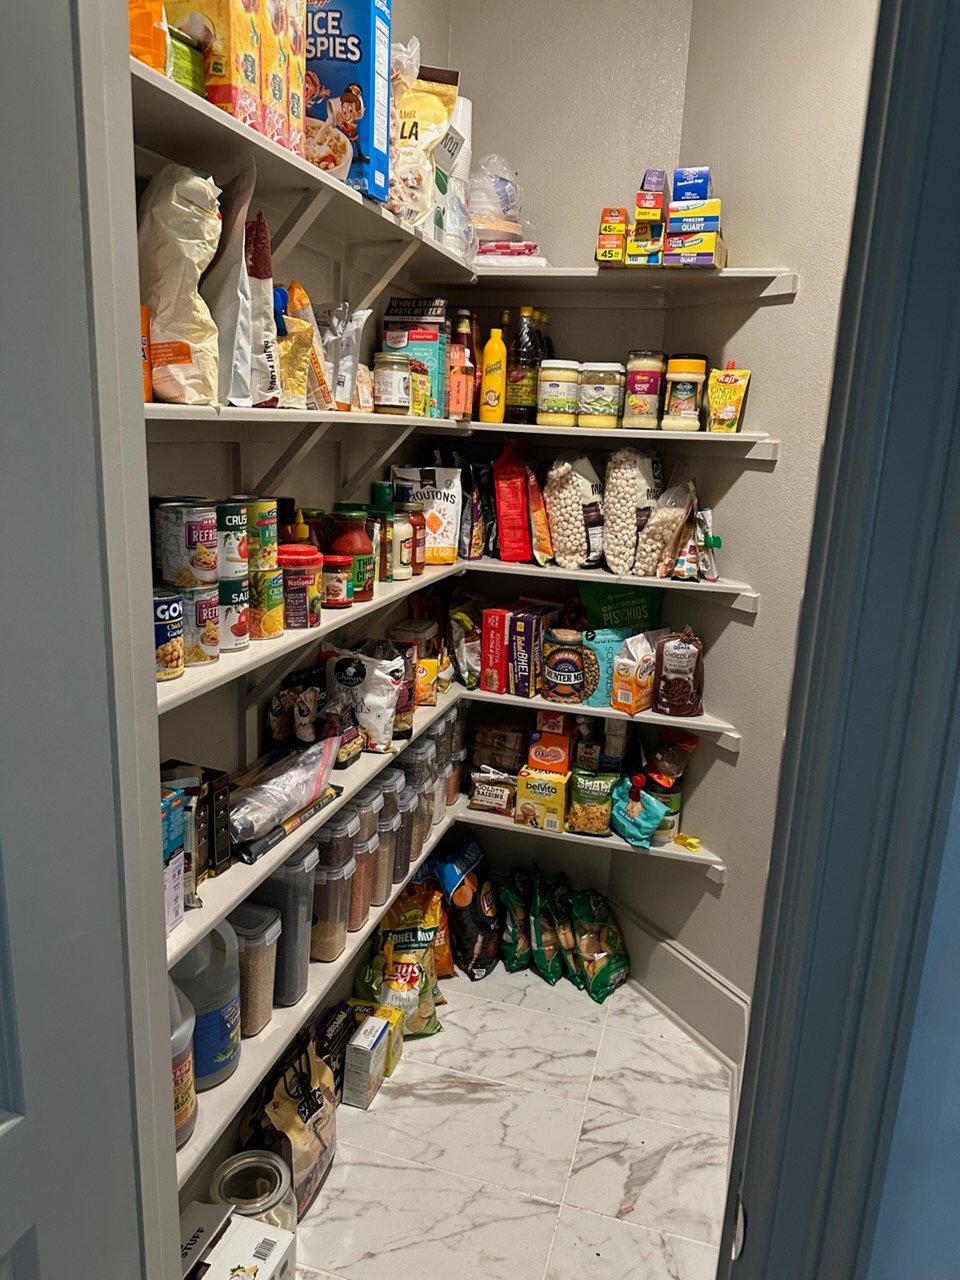
Most pantries do not fall apart because the owner is messy. They fall apart because the setup never matched how the household actually cooks, snacks and shops. If you want to learn how to organize a pantry that stays organized, the secret is less about pretty containers and more about building a system your whole family can follow without thinking. Here is the same method I use in pantries all over the Austin area.
Step 1: Empty It Completely and Be Honest About What You Use
I know it is tempting to tidy one shelf at a time, but pulling everything out is the only way to see what you really have. Clear your counters or set up a folding table, then take every item out of the pantry.
- Check dates as you go. Expired spices, stale crackers and that bag of flour from two moves ago can go.
- Pull duplicates together. Three open bags of brown sugar is a sign that things are hard to see, not that you love brown sugar.
- Set aside unopened, unexpired food you will not eat. Many local food pantries in Austin, Round Rock and Pflugerville accept donations, so it can go to someone who needs it.
While the shelves are empty, wipe them down. In our Central Texas humidity, a quick check for crumbs and sticky spots helps keep pests out, which matters as much as how things look.
Step 2: Sort Into Categories That Match Your Kitchen
Before anything goes back in, group like with like on your counter. Common categories include:
- Breakfast (cereal, oatmeal, pancake mix)
- Baking (flour, sugar, chocolate chips, sprinkles)
- Pasta, rice and grains
- Canned goods and jars
- Snacks for kids and snacks for grown-ups
- Oils, vinegars and sauces
- Backstock (the extra you bought on sale)
Your categories should reflect your life. A family that bakes every weekend needs a generous baking zone. A household that lives on quick lunches might need a large grab-and-go section and a tiny baking shelf. There is no wrong answer, only the one that fits you.
Step 3: Zone Your Pantry Shelves by How Often You Reach
This is where a pantry starts to work. Think about height and frequency:
- Eye level: the things you use every day, like breakfast foods, snacks and cooking staples.
- Lower shelves: kids' snacks they can grab on their own, plus heavy items like bulk rice or drinks.
- Top shelves: backstock, holiday baking supplies and small appliances you use a few times a year.
- Door and side walls: over-door racks are perfect for spices, packets and small jars that get lost on deep shelves.
Deep shelves are where good intentions go to disappear. Use pull-out bins so the back of the shelf is only one tug away. Turntables work well in corners for oils, sauces and condiments, since everything spins to the front.
Step 4: Contain and Label So Everyone Can Keep It Up
Containers are useful, but they come after the sorting, not before. Measure your shelves first, then choose:
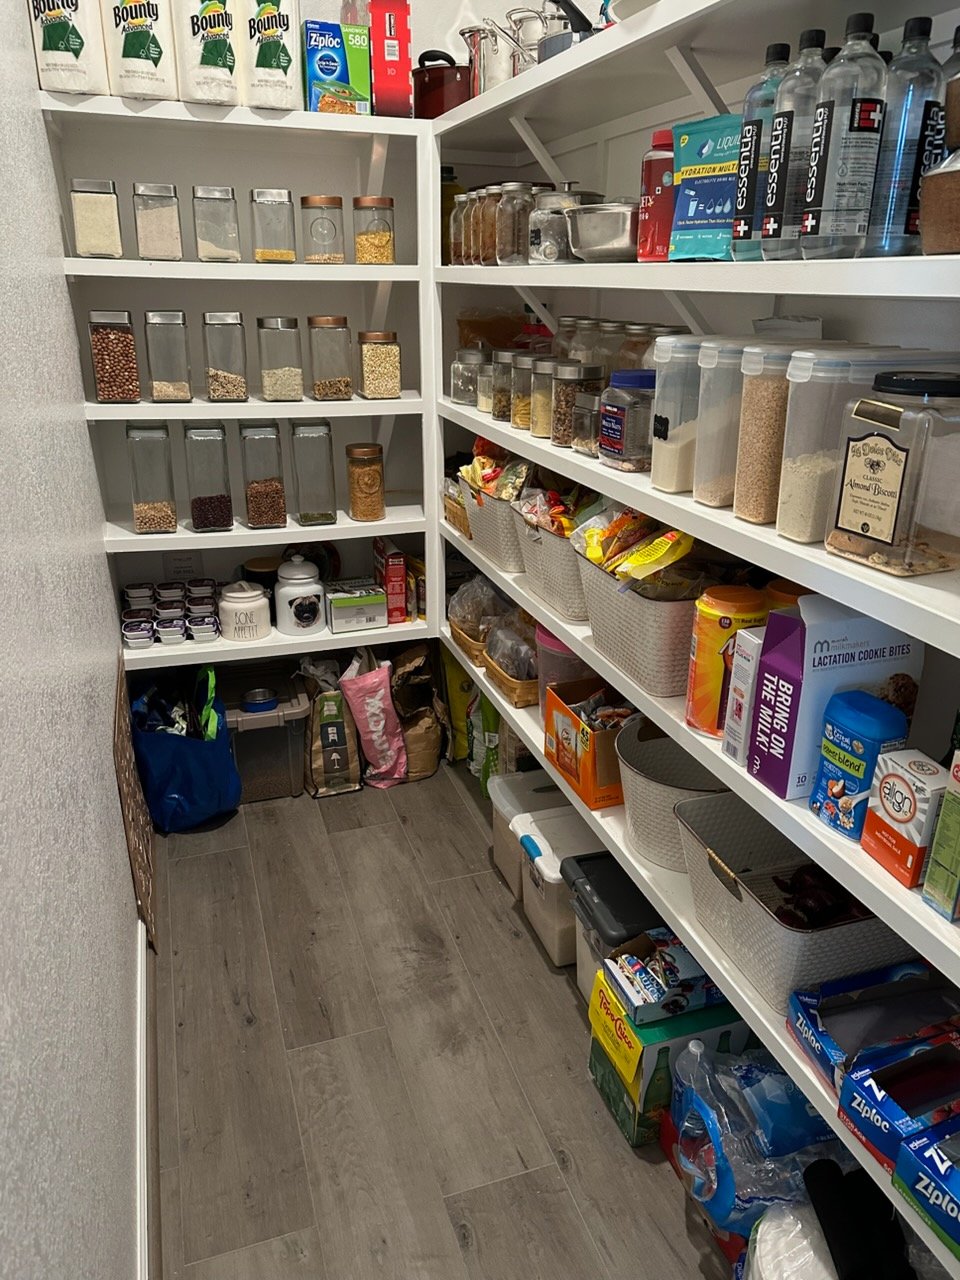
- Clear bins for categories like snacks or baking, so you can see when you are running low.
- Airtight canisters for things you go through quickly, such as cereal, rice and pasta. They also help keep humidity and bugs out.
- Tiered risers for canned goods, so labels in the back row are still visible.
Then label everything, including the bins. Labels are not about looking perfect. They tell the rest of the household where things go when they unload groceries, which is the moment most pantries start to slide. If you decant, cut the cooking instructions off the original box and tape them to the back of the canister.
One of my clients described the result this way:
"Our pantry went from cluttered and hard to use to clean, intuitive... Everything now has a clear place, categories make sense, and it's so much easier to find what we need." – Jimmy L.
That is the goal: a space that feels easy, not one that needs constant attention. You can see more finished kitchens and pantries in my before and after gallery.
Keeping Your Pantry Organized Week After Week
A pantry stays organized when upkeep takes minutes, not an afternoon. A few habits that make a big difference:
- Do a five-minute reset before you shop. Push items back into their zones, toss empty boxes and jot down what is low.
- Leave a little breathing room. If every bin is packed to the brim, new groceries end up on the floor. Aim to fill bins about three quarters full.
- Give backstock one home. Extra items live on the top shelf or in a hall closet (not the hot garage), and only one of each comes down at a time.
- Adjust when life changes. A new baby, a new diet or teenagers who eat everything in sight all call for a small reshuffle. That is normal, not a failure.
If your pantry is part of a larger kitchen project, my home organizing services cover cabinets, drawers and everything in between, and I work with families in Austin, Round Rock, Cedar Park, Leander, Pflugerville and Manor.
If you would rather have a hand with this, I would love to help. Book a free consultation or call or text me at 737-376-1599, and we can talk through your space and what would make it work for you.